


Key Takeaways:
An MVP helps businesses introduce a basic app version, evaluate user interest, and gather early feedback before investing in a complete product.
Successful MVP development starts with understanding customer needs, studying competitors, and selecting features that solve core problems. User feedback helps determine which improvements deserve priority.
An MVP launch provides insights for future development. Regular updates, careful budget management, and a flexible technical foundation help businesses improve the app and support future growth.
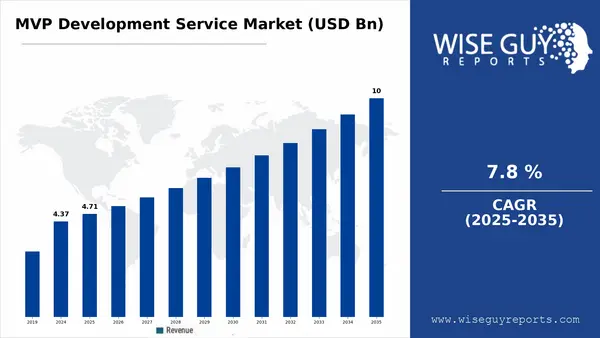
The MVP development services market is expected to grow from $4.71 billion in 2025 to $10 billion by 2035.
If you are interested in developing an MVP, there is no better time than now to turn your idea into a working product and test it in the market.
So, what exactly is an MVP? An MVP(Minimum Viable Product) is the simplest version of your app that includes the core features needed to solve one main problem for your users.
Instead of spending months building every feature, you launch a basic version, collect feedback from real users, and improve it step by step.
Let’s understand this with an example:
Suppose you want to build a food delivery app. A full version would require live order tracking, multiple payment options, loyalty rewards, restaurant ratings, and more.
But an MVP would include only the basics: browsing restaurants, placing an order, and making a payment.
You launch this in one city, see how people use it, and learn from their user feedback what they actually want.
If users keep asking for live tracking, you add it in the next version. If nobody uses the rewards, you have saved money by never building them.
This approach matters because 42% of startups fail due to a lack of market demand. An MVP helps you check whether people actually want your product before you invest a large budget and a lot of time in it.
Here is a depiction of key market stats showing why starting with an MVP is a smart move:
In this blog, we will cover the benefits of building an MVP, the step-by-step development process, and how much it costs to build one for your mobile app.
What Is an MVP in Mobile App Development?
A minimum viable product is an initial version of a mobile application built with the core features required to deliver its main purpose.
For example, imagine a business wants to create a dating app. A complete app may include video calls, AI-based match suggestions, in-app gifts, premium subscriptions, live events, advanced filters, and many other features.
An MVP may only include:
-
User registration and login
-
Profile creation with photos and bio
-
Basic preferences like age and location
-
Swipe or match feature
-
In-app chat after a match
-
Basic safety tools like block and report
-
Push notifications for new matches
-
Basic admin management
The goal is not to create an incomplete or poorly designed app. Here, the aim is to build a focused product that gives users enough value to test the main idea.
Once the MVP is launched, businesses can study how users interact with it and decide which features should be improved, added, or removed.
Why Build an MVP for a Mobile App?
Want to create a mobile app? Not every idea turns into a success. An MVP lets you test your idea before you spend big.
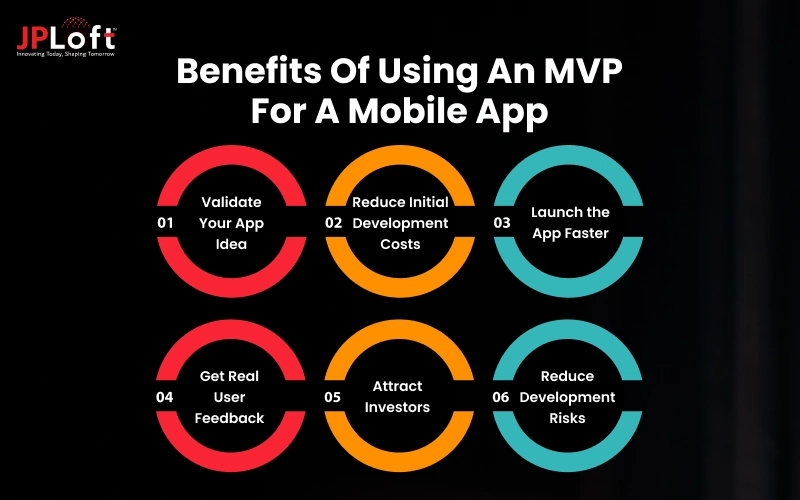
Here’s why starting small is the right first step:
1. Validate Your App Idea
An idea may look promising on paper but perform differently once real users start using it.
An MVP lets businesses test the concept with actual customers. Their feedback can show whether the app solves a genuine problem and whether users are willing to use it regularly.
This helps reduce the risk of spending a large budget on an idea that does not attract enough users.
2. Reduce Initial Development Costs
A complete mobile application can include dozens of features. Building all of them at once requires more development time, testing, design work, and infrastructure.
An MVP focuses on the most important features first. This reduces the initial development scope and allows businesses to use their budget more carefully.
Instead of paying for features users may never need, businesses can prioritize features based on actual demand.
3. Launch the App Faster
Building a full-featured application can take several months or longer.
Since an MVP has a smaller scope, the development team can focus on the core functionality and prepare the first version for launch sooner.
An early launch also gives businesses more time to collect feedback while competitors may still be working on similar ideas.
4. Get Real User Feedback
User feedback is one of the most valuable parts of an MVP.
Analytics, reviews, surveys, support requests, and user behavior can reveal which features people like and where they face problems.
For example, users may repeatedly request a feature that was not part of the original plan. On the other hand, a feature that seemed important during planning may receive very little attention.
This information helps shape the next version of the product.
5. Attract Investors
A working MVP can make an app idea easier to demonstrate to potential investors.
Instead of showing only presentations or prototypes, businesses can demonstrate how the product works and provide early user data.
Metrics such as downloads, active users, retention, engagement, and revenue can help investors understand the product's market potential.
6. Reduce Development Risks
A proper guide to mobile app development always includes a list of technical and business risks.
An MVP allows teams to identify problems earlier. These may include performance issues, integration challenges, confusing navigation, payment problems, or difficulties with a particular technology.
Fixing these issues in a smaller product is generally easier than discovering them after the entire application has been developed.
MVP vs Full-Featured App: What’s the Real Difference?
Confused between starting small and going big? You are not alone. Many founders want every feature on day one, but that path is costly and risky.
An MVP does the opposite. It focuses on one core problem and launches first.
A full-featured mobile app takes more time and money; it comes with advanced features and a polished experience.
So, which one fits your idea? The table breaks down the key differences:
|
MVP |
Full-Featured App |
|
Focuses on core functionality |
Includes a broader feature set |
|
Smaller development scope |
Larger development scope |
|
Lower initial investment |
Higher initial investment |
|
Faster launch |
Longer development cycle |
|
Designed for market validation |
Designed for a mature user base |
|
Relies heavily on early feedback |
Based on validated requirements |
|
Features are added over time |
Most features are planned upfront |
An MVP should not be treated as the final product. It is the starting point for building a product based on real market information.
MVP Mobile App Development Process
MVP application development is not about rushing. It is about following the right steps in the right order.
When you launch a mobile app without a clear process, time and budget slip away fast. With a simple plan, you stay focused on what matters.
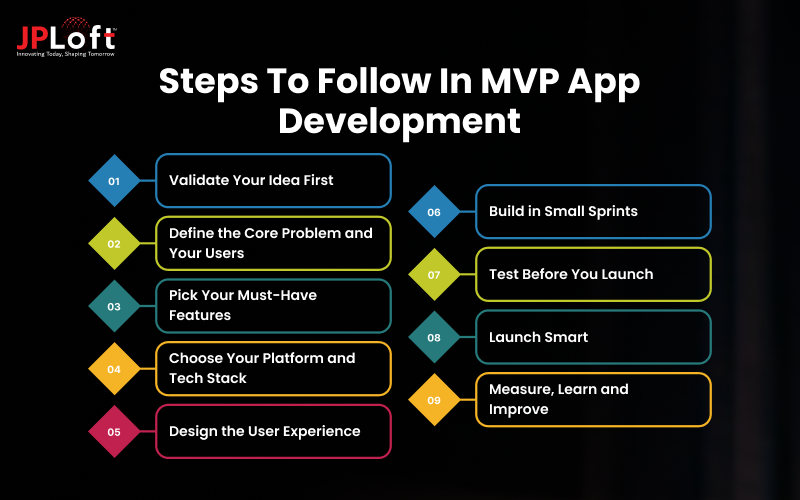
Every strong MVP mobile app development journey follows a few key stages. Let’s walk through each one below:
Step 1: Validate Your Idea First
Most apps do not fail because of bad code. They fail because nobody needed them. Startups.com has often listed “no market need” among the top reasons startups shut down.
So start with proper market research before you write a single line of code:
-
Talk to real users: Ask 10 to 15 people about the problem. Listen more than you pitch.
-
Study competitors: Read their app store reviews. Complaints show you the gaps.
-
Check search demand: Google Trends and Keyword Planner show what people actually look for.
-
Run a landing page test: Collect email signups before you build anything.
If people show interest, you are on the right track. Now let’s sharpen the problem you plan to solve.
Step 2: Define the Core Problem and Your Users
An MVP should solve one problem well. Not five problems badly.
Write one simple sentence: “My app helps xyz users to do this task without facing these issues”
Then build a basic user persona. Include age, habits, goals, and frustrations; this keeps every later decision grounded in real needs.
This step matters most in MVP app development for startups. Small teams have limited budgets. A clear focus saves both money and months.
Quick tip: If you cannot explain your app in one sentence, the idea is still too broad.
Step 3: Pick Your Must-Have Features
This is where most founders struggle. Every feature feels important.
Use the MoSCoW method to cut through the noise:
-
Must have: Features the app cannot work without
-
Should have: Useful but not urgent
-
Could have: Nice extras for later
-
Won’t have (for now): Ideas parked for version two
Here is a quick example. Say you are building a food delivery app. Your MVP needs sign-up, menu browsing, ordering, and payment. Live driver tracking and loyalty points can wait.
Ask one question for every feature: “Will users still get value without this?” If yes, move it out.
Step 4: Choose Your Platform and Tech Stack
Now decide where your app will live. You have three main routes:
-
Android only: Wider reach in markets like India
-
iOS only: Often better for premium audiences
-
Cross-platform: One codebase for both, using Flutter or React Native
For most startups, cross-platform is a smart pick. It cuts development time and cost. You can always go native later when the app grows.
Also think about your backend. Cloud services like Firebase or AWS help you launch fast without heavy setup.
Step 5: Design the User Experience
Good design builds trust in seconds. Bad design sends users away.
Follow this simple flow:
-
Wireframes: Rough sketches of each screen
-
Clickable prototype: A test version made in Figma
-
User testing: Let 5 to 8 people try it and watch where they get stuck
Keep the interface clean. Fewer taps and fewer screens work better in MVP application development. Fix confusing steps now. It costs far less than fixing them after development.
Step 6: Build in Small Sprints
Now the real work begins. Break development into short sprints of about two weeks each.
Every sprint should end with something you can see and test. This is the agile way. It helps you spot problems early.
Your team will usually work on three parts:
-
Front end: What users see and tap
-
Back end: Servers, databases, and logic
-
APIs: The bridge that connects both
Most app development MVP projects take around 2 to 4 months. Timelines depend on scope and team size. Review progress every week so nothing drifts.
Step 7: Test Before You Launch
A buggy app kills first impressions. Many users never return after one bad experience.
Cover these checks:
-
Functional testing: Does every feature work?
-
Device testing: Does it run on different screen sizes and OS versions?
-
Performance testing: Does it load fast and handle traffic?
-
Security testing: Is user data safe?
Then run a beta test. Invite a small group through TestFlight or Google Play’s internal testing. Their feedback is gold.
Step 8: Launch Smart
Your MVP does not need a grand launch. It needs the right first users.
-
Prepare a clear app store listing with strong screenshots
-
Use keywords people actually search in your app title and description
-
Share it in communities where your target users spend time
-
Offer early access or a small perk to your first 100 users
Launch to a limited audience first. Fix issues quietly. Then scale.
Step 9: Measure, Learn and Improve
Launch day is not the finish line. It is where real learning begins.
Track numbers that show real behavior:
-
Retention rate: Do users come back after day 1, day 7, and day 30?
-
Activation rate: Do they complete the key action?
-
Churn: When and why do they leave?
-
User feedback: Reviews, surveys, and support chats
Use this data to decide your next move. Double down on what works. Drop what does not. This build-measure-learn loop is the heart of MVP in app development.
Why Budget Planning Is Essential Before MVP Development?
Skipping the budget plan is one of the fastest ways to stall your MVP application development. Many founders start building and only later realize the money is running out.
A clear budget is the need of the hour, where every decision is focused, and every dollar is accountable.
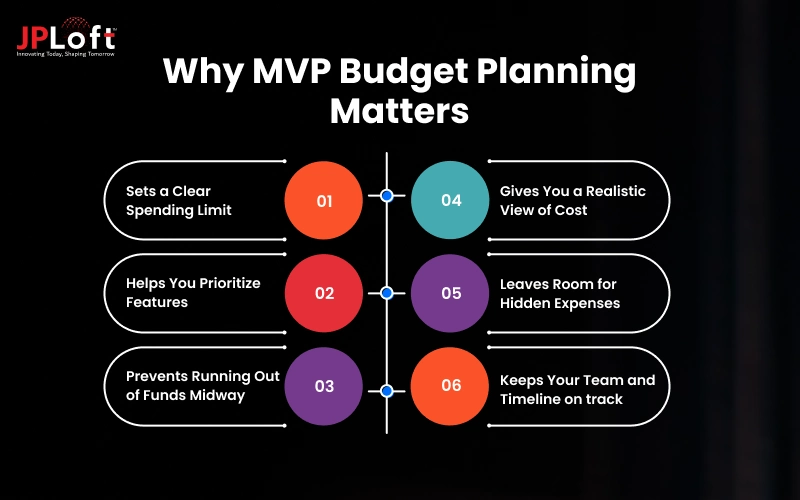
Here is why planning your numbers first makes all the difference:
1. Sets a Clear Spending Limit
Without a budget, costs creep up quietly. One extra feature here, one more revision there.
A fixed limit helps you say no to things that do not matter. Your minimum viable product development cost stays under control from day one.
2. Helps You Prioritize Features
When money is limited, every feature must earn its place.
A budget forces you to ask: “Is this a must-have or a nice-to-have?” That is exactly how a lean MVP is built.
3. Prevents Running Out of Funds Midway
Many apps stop halfway because the money runs out before the app is ready.
A solid plan covers design, development, testing, and launch. So you do not get stuck with a half-built product.
4. Gives You a Realistic View of Cost
Founders often guess the cost and guess it too low.
When you break the budget into stages, you see where each dollar goes. Your mobile app development cost becomes a clear number instead of a rough guess.
5. Leaves Room for Hidden Expenses
The development bill is not the only cost. Some expenses show up later:
-
App store fees
-
Server and cloud hosting
-
Third-party tools and APIs
-
Bug fixes after launch
-
Marketing and user acquisition
Plan for these early. They can add up fast.
6. Keeps Your Team and Timeline on Track
Money and time are linked. A delay in the schedule almost always raises the cost.
A clear budget gives your team a target. Everyone knows the scope, and no one builds extra things by mistake.
How Much Does It Cost to Build an MVP Mobile App?
The cost to develop an MVP mobile app can range from around $15,000 to $100,000+, depending on the project's complexity and requirements.
A basic MVP with a limited feature set may cost less, while an application involving advanced technologies, real-time functionality, complex integrations, or multiple platforms can require a larger budget.
Here is a general estimate:
|
MVP Type |
Estimated Cost |
|
Basic MVP |
15,000–30,000 |
|
Medium-complexity MVP |
30,000–60,000 |
|
Advanced MVP |
60,000–100,000+ |
These are broad estimates. Your actual mobile app development cost depends on the features, platforms, and design you choose.
Factors That Affect MVP Development Cost
Why do two MVPs with similar ideas have very different price tags? The answer lies in a few key choices.
Your minimum viable product development cost depends on what you build, how you build it, and who builds it.
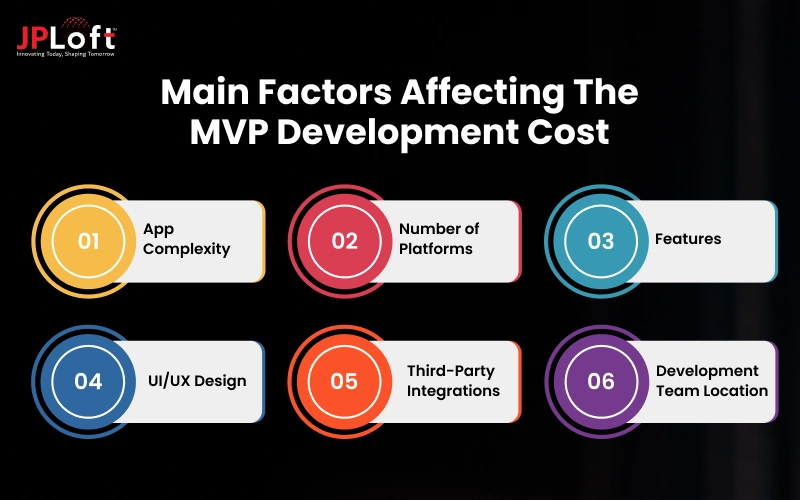
Let’s look at the main factors that move the number up or down:
1. App Complexity
A simple content-based or service app needs less development work. You can think of your app with basic screens, a login, and a contact form.
But an app with real-time chat, location tracking, AI, or complex workflows takes far more effort. Each of these features needs extra coding, testing, and server setup.
More complexity means more development hours. And more hours mean a higher cost.
2. Number of Platforms
Building for Android only may have a different cost from developing separate native applications for both Android and iOS.
Cross-platform development can also affect the overall budget depending on the project's requirements.
3. Features
The number and complexity of mobile app features directly impact development effort.
Basic authentication and profiles require less work than features such as real-time tracking, video calls, AI recommendations, or advanced payment systems.
4. UI/UX Design
A simple interface needs less design work. Think of clean screens with standard buttons and layouts.
But a highly customized experience takes more time. Animations, complex interactions, and multiple user journeys all need extra design and testing.
The more custom the design, the higher the cost.
5. Third-Party Integrations
Payment gateways, maps, social logins, analytics tools, CRM systems, cloud services, and other APIs can increase development and testing requirements.
Each integration needs setup, error handling, and regular updates, so the effort adds up quickly.
6. Development Team Location
Development rates vary by region and team structure.
The cost can also differ based on whether the project is handled by freelancers, an in-house team, or a mobile app development company.
How to Reduce MVP Application Development Costs?
Businesses can control MVP costs by keeping the first version focused.
Start with the core problem instead of trying to include every planned feature. Reuse proven technologies where appropriate and avoid unnecessary custom functionality during the first release.
It is also useful to create a detailed scope before development begins. Frequent changes during development can increase both time and cost.
A phased approach can work better:
Phase 1: Core MVP
Phase 2: User feedback and improvements
Phase 3: Advanced features
Phase 4: Product expansion
This allows businesses to invest more as the product gains validation.
Common Mistakes to Avoid When Building an MVP
Planning a mobile app development MVP? A few small mistakes can quietly drain your budget and time.
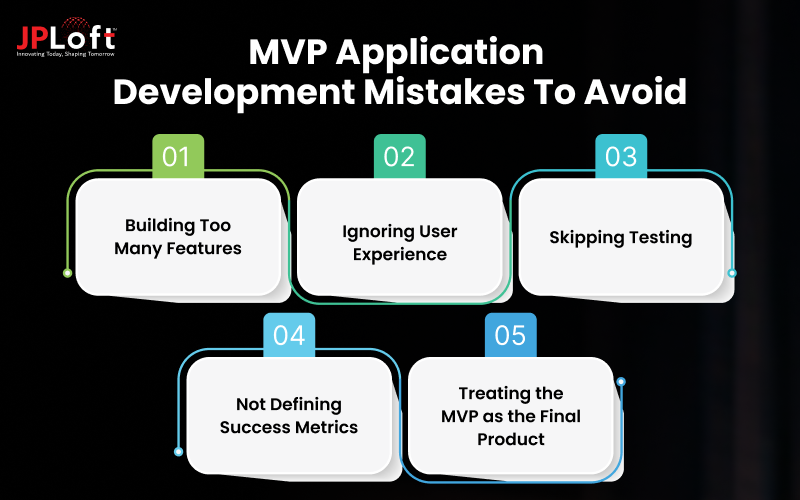
Most of these errors are easy to avoid once you know them. Let’s look at the common ones so you can steer clear:
Mistake 1. Building Too Many Features
An MVP should not become a smaller version of the complete product with dozens of features.
Too many features increase costs and make it harder to understand what users actually value.
Mistake 2. Ignoring User Experience
MVP does not mean poor design.
Users should still be able to navigate the application easily and complete important tasks without confusion.
Mistake 3. Skipping Testing
Launching quickly without proper testing can lead to crashes, payment failures, security issues, and negative reviews.
Even one bad first experience can make users uninstall the app for good.
Mistake 4. Not Defining Success Metrics
Before launch, decide how success will be measured.
For example, the goal could be a specific number of active users, a certain retention rate, or a target number of completed transactions.
Mistake 5. Treating the MVP as the Final Product
An MVP is designed to generate learning.
Businesses should be prepared to improve the product based on actual user behavior rather than assuming the first version will be perfect.
How to Calculate the Long-Term ROI of Your MVP?
Launching an MVP is only half the job. The real question is whether it pays you back.
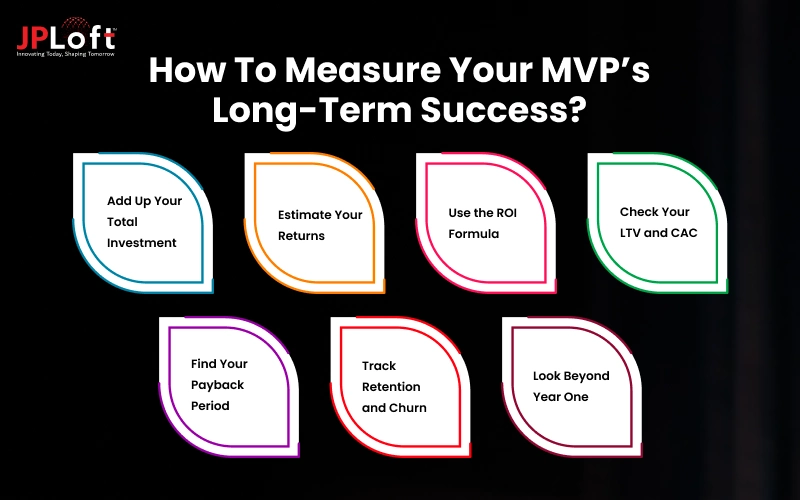
Here is a simple way to measure your MVP ROI, step by step:
Step 1: Add Up Your Total Investment
Start with every rupee or dollar you spent. Do not skip the small items.
-
Design and development
-
Testing and bug fixes
-
Cloud hosting and server costs
-
App store fees
-
Third-party tools and APIs
-
Marketing and user acquisition
-
Monthly maintenance and updates
Many founders count only the build cost. That makes the ROI look better than it really is.
Step 2: Estimate Your Returns
Now list how your MVP earns value. Pick the ones that fit your idea:
-
Subscriptions or in-app purchases
-
Ad revenue
-
Commissions per booking or order
-
Cost savings (for example, fewer manual tasks)
-
Funding raised because of early traction
Be careful here. Revenue is not always available in the earliest MVP stage. So track leading signals too, like signups and repeat usage.
Step 3: Use the ROI Formula
App ROI (%) = (Total Returns − Total Costs) ÷ Total Costs × 100
Quick example:
-
Development: $30,000
-
Marketing: $8,000
-
Maintenance for 12 months: $4,000
-
Total investment: $42,000
-
Revenue in 12 months: $60,000
ROI = (60,000 − 42,000) ÷ 42,000 × 100 = about 43%
That is a healthy first-year result for MVP app development.
Step 4: Check Your LTV and CAC
ROI alone can hide problems. Two more numbers tell the full story.
-
LTV (Lifetime Value): How much one user pays you over their entire time in the app.
-
CAC (Customer Acquisition Cost): How much you spend to win one user.
Say each user pays $10 a month and stays 8 months. Your LTV is $80. If CAC is $25, your LTV to CAC ratio is about 3.2.
Many startup teams treat 3:1 as a healthy target. Below that, growth gets expensive.
Step 5: Find Your Payback Period
Payback period tells you how fast you earn back your acquisition cost.
Formula: CAC ÷ monthly revenue per user
In our example: $25 ÷ $10 = 2.5 months
The shorter this number, the safer your cash flow. Many teams aim to recover costs within 12 months.
Step 6: Track Retention and Churn
Retention is the quiet driver of long-term ROI.
A user who stays six months is worth far more than one who leaves in a week. So watch these numbers every month:
Day 1, day 7, and day 30 retention
-
Monthly churn rate
-
Average session length
-
Repeat purchase rate
If retention is weak, fix the product before you spend more on ads.
Step 7: Look Beyond Year One
An MVP’s value grows over time. So do your costs.
For a long-term view, multiply expected revenue by the app’s lifespan. Then add maintenance costs over that lifespan to the development cost. Compare the two to see the bigger picture.
Also factor in:
-
Feature upgrades after feedback
-
Rising server costs as users grow
-
Future marketing spend
-
Savings from not building the wrong features
That last point is often ignored. An MVP that stops you from building useless features has already saved you money.

Bring Your MVP to Life With JPLoft
An MVP gives founders a practical way to test their assumptions before investing in a complete product. Early users reveal which features matter, where the experience falls short, and whether the solution is valuable enough to pay for.
Tracking engagement, repeat usage, and early sales helps founders decide what to improve and gives investors clearer evidence to evaluate.
The right funding route depends on the startup’s stage, business model, and growth plans. Founders may explore angel investment, venture capital, crowdfunding, or relevant government and community funding programs.
JPLoft helps startups turn early ideas into testable products through focused MVP development services.
From identifying essential features and choosing the technology stack to development, testing, and launch, our approach keeps the initial build centered on what founders need to learn.
After launch, user feedback and product data guide the next round of improvements. This helps founders prioritize development, manage their budget, and approach funding conversations with a clearer understanding of their product’s potential.
Have an idea worth testing? Talk to JPLoft about building an MVP that helps you learn, improve, and plan your next move.
Final Thoughts
An MVP provides a practical way to test a mobile app idea before committing to full-scale development.
It reduces the initial scope, supports faster market entry, and gives businesses access to real user feedback.
The key is to focus on the problem, prioritize essential features, build a usable product, measure its performance, and improve it based on what users actually need.
The cost of an MVP can vary widely, but a focused development approach can help control the initial investment. Once the MVP proves its value, businesses can gradually add.
FAQs
An MVP is the simplest version of your app. It includes only the core features needed to solve one main problem. You launch it, collect real user feedback, and improve it step by step. It is the smartest way to test your idea before investing in a full app.
The cost usually ranges from $15,000 to $100,000+. It depends on your features, platforms, and design. A basic MVP costs less. An app with real-time features, AI or complex integrations costs more. Your mobile app development cost also changes with the team you choose.
Most MVPs take around 2 to 4 months. Simple apps can launch sooner. The timeline depends on your scope and team size. A clear feature list and fewer changes during the build help you launch faster.
Not legally, but it is highly recommended. MVP app development for startups helps you check demand before spending big. This matters because about 42% of startups fail due to a lack of market demand. An MVP lowers that risk.
An MVP focuses on core features and launches fast. A full-featured app has a broader feature set and a longer build time. An MVP is built to learn from users. A full app is built for a mature user base.
Keep your first version focused. Solve one core problem and skip extra features for now.
Here are a few simple ways to save money:
Write a detailed scope before development starts
Reuse proven technologies
Avoid frequent changes mid-project
Build in phases and add advanced features later

Priyanka Sukhwal is the Managing Director and Business Head of JPLoft, with 10+ years of experience in technology, digital product strategy, and business growth. She has worked closely with businesses building mobile applications, custom software, marketplaces, and on-demand platforms across mobility, automotive, consumer services, and startup ecosystems. At JPLoft, she focuses on understanding business models, identifying product opportunities, and helping companies plan digital solutions that can scale with changing market needs.



Share this blog