


In 2012, Mark Zuckerberg openly admitted: “The biggest mistake we made as a company was betting too much on HTML5 as opposed to native.”
That hard-won lesson eventually led Facebook to create React Native, and more than a decade later, the framework is powering some of the world’s most-used apps.
Today, React Native’s New Architecture has reached 80% adoption across the community, while Microsoft alone uses it to deliver experiences to over 600 million Office users every day.
The promise of writing truly native apps for iOS and Android with a single JavaScript/TypeScript codebase is no longer a gamble. It’s the new standard.
If you are looking to choose React Native for mobile app development and wondering whether or not it is the right move for your project, this blog walks through the practical details so you can decide with clearer information.
What Is React Native?
React Native is an open-source framework created by Meta that lets developers write mobile applications in JavaScript and React.
The same code can target both iOS and Android, which means a single team can create a mobile app that runs on the two major platforms without maintaining fully separate projects.
The React Native cross-platform app development framework is expected to grow at a CAGR of approximately 16.8% between 2025 and 2032.
Developers describe the user interface with familiar React components, and React Native maps those descriptions to the actual native UI elements on each device.
The result looks and behaves like an app built with Swift or Kotlin, yet most of the business logic stays in one place.
This setup works especially well for teams that already know React from web work and want to move into mobile without learning an entirely new language.
Because the framework reaches into the native layer for rendering and device features, the finished product can access the camera, location services, and other hardware the same way a fully native app would.
If you are looking to choose React Native for mobile app development, you might be wondering whether or not it is the right move for your project. This blog walks through the practical details so you can decide with clearer information.

Why Use React Native for Mobile App Development?
A top-rated mobile app development company can use React Native to connect device features with a shared codebase, reducing the need to maintain separate implementations.
If you are looking for clear reasons to choose this framework, here are some practical ones that matter for most projects:
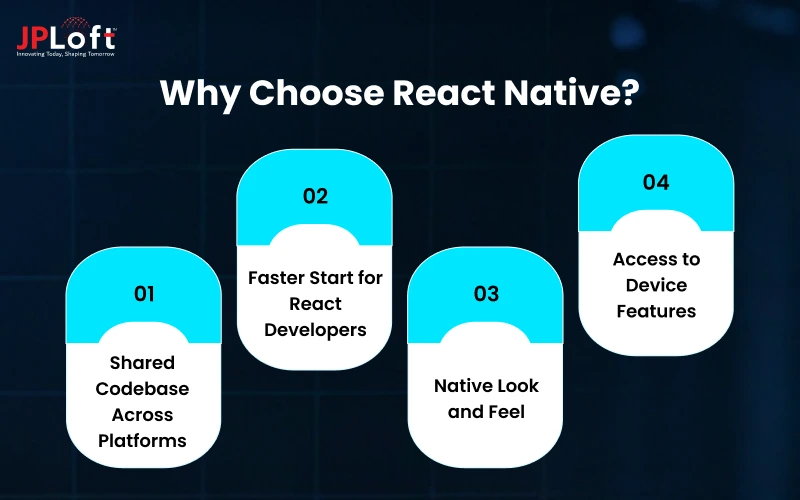
1. Shared Codebase Across Platforms
A single JavaScript codebase handles the main logic and most of the interface for both platforms.
Updates and bug fixes land in one place instead of requiring separate changes for iOS and Android projects.
2. Faster Start for React Developers
Developers who already know React can start building screens and state management right away.
This shortens the time needed to move from web experience into shipping a working mobile interface.
3. Native Look and Feel
The framework maps JavaScript components to real native UI elements on each device.
React Native mobile app development helps create familiar buttons, gestures, and interactions across iOS and Android.
4. Access to Device Features
When the app needs camera access, location data, or push notifications, React Native connects JavaScript calls to the phone’s native modules.
Those features work without rewriting the entire feature for each platform.
Features of React Native for Mobile Apps
Understanding the key features of React Native for mobile apps helps businesses build fast, secure, cross-platform mobile applications efficiently.
1. One Codebase for Two Platforms
You write most of the app once in JavaScript. The same code runs on both iOS and Android.
This cuts the work of maintaining two separate projects and keeps features consistent across devices.
2. Real Native Components
React Native does not draw fake elements on a web view. It uses the actual buttons, lists, and text fields from iOS and Android.
Users get the same gestures and performance they expect from fully native apps.
3. Fast Refresh During Development
When you change code, the app updates on the device or emulator almost instantly. You keep the current state of the screen instead of restarting everything.
This makes testing small changes much quicker during daily work.
4. Familiar React Syntax
If you already know React from web projects, the component structure feels natural. You describe the interface with the same ideas of props, state, and hooks.
The learning path stays short for teams that already work with JavaScript.
5. Access to Device Hardware
The framework lets JavaScript talk to the phone’s camera, location, sensors, and storage.
Native modules handle the actual connection to the hardware.
You can add these features without leaving the main JavaScript codebase.
6. Platform-Specific Code When Needed
Most of the app stays shared, but you can still write small pieces of code only for iOS or only for Android.
This gives flexibility when one platform needs a different look or behavior. You keep the shared core while handling the differences cleanly.
7. Large Library Ecosystem
Thousands of ready-made packages exist for navigation, forms, maps, and charts.
Most of them work on both platforms with little extra setup.
Developers can focus on the unique parts of the app instead of building every tool from scratch.
8. Strong Community Support
A large group of developers and companies maintain the framework and share solutions.
Questions get answered quickly, and common problems already have tested fixes.
This steady support helps teams solve issues without getting stuck for long.
What Apps Can You Build With React Native?
As intended, React Native mobile application development works well for many kinds of apps because the same code can reach both iOS & Android while still using real native components.
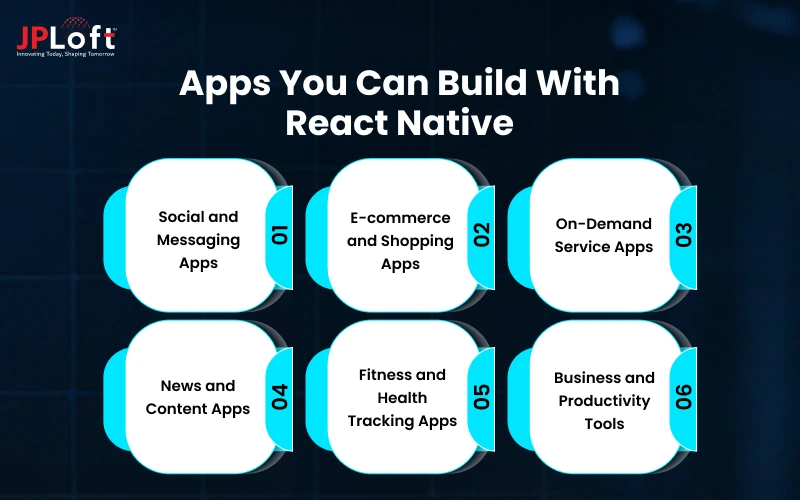
Here are some popular types of apps you can build with React Native across different industries and use cases:
1. Social and Messaging Apps
You can create a social media app with chat screens, build real-time message lists, and develop photo-sharing features.
The framework helps make smooth scrolling and live updates work the same way on both platforms.
2. E-commerce and Shopping Apps
Teams build e-commerce platforms with product pages, shopping carts, and secure checkout flows.
React Native makes it possible to keep browsing and buying fast for users on iOS and Android.
3. On-Demand Service Apps
Developers build booking screens, add live location tracking, and provide real-time order status updates.
The shared code makes maps and real-time features easier to maintain across both platforms.
4. News and Content Apps
You can develop a news app with article feeds, build clean reading pages, and develop video sections.
React Native helps make scrolling and opening new stories feel native on every device.
5. Fitness and Health Tracking Apps
Teams make a fitness app with step counters, build workout logs, and develop progress charts.
The framework makes it simple to pull sensor data and show results in clear screens.
6. Business and Productivity Tools
Developers create a productivity app with task lists, build note features, and develop simple internal tools.
One codebase makes updates appear on both iOS and Android without extra work.
React Native App Development Process: A Complete Guide
A structured development process helps turn an app idea into a reliable product without wasting time on features that users may not need.
When businesses use React for mobile development, it provides a practical way to build iOS and Android apps from a shared codebase while still supporting native device capabilities.
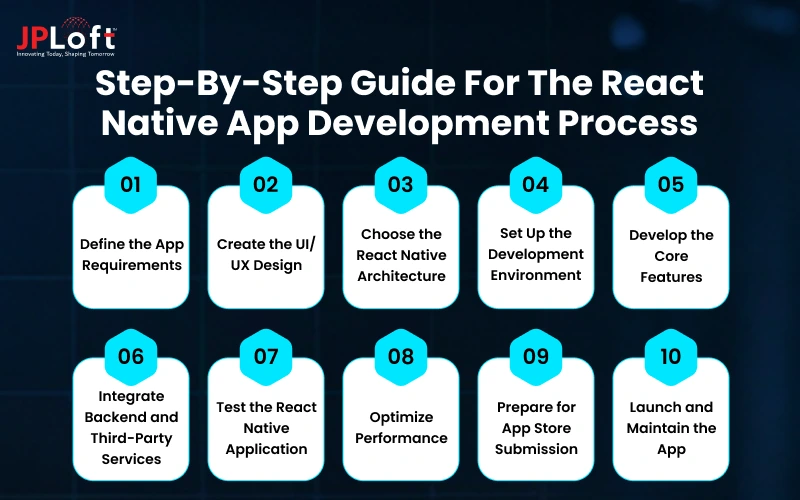
Here is the process to get started:
1. Define the App Requirements
The first step is to turn the app idea into clear product requirements. Instead of starting directly with development, the team should define what the app needs to do, who will use it, and what business problem it should solve.
-
Identify the target users: Define the primary user groups and understand what they need from the app. For example, a food delivery app may have customers, delivery partners, and restaurant staff with different requirements.
-
List the core features: Separate essential features from optional additions. User registration, profiles, search, payments, notifications, and admin controls may form the initial scope depending on the app type.
-
Define user flows: Map how users will move through the app, such as signing up, searching for a service, placing an order, making a payment, and tracking the result.
-
Set technical requirements: Decide which device features the app will need, such as GPS, camera, microphone, Bluetooth, push notifications, or biometric authentication.
-
Plan the MVP: Select the features required to release the MVP. This keeps development focused and provides a clear foundation for future versions.
A detailed requirements document also gives designers and developers a shared reference throughout the project, reducing changes caused by unclear expectations.
2. Create the UI/UX Design
Once the requirements are clear, the next step is to focus on UI/UX design. The focus should be on creating a simple user journey rather than adding visual elements that do not improve the experience.
-
Build wireframes: Create basic layouts for important screens such as onboarding, login, home, search, profile, checkout, and settings. Wireframes help identify navigation problems before detailed design work begins.
-
Design the user interface: Convert the approved wireframes into high-fidelity screens with typography, spacing, icons, colors, buttons, forms, and other interface elements.
-
Design for iOS and Android: Keep platform-specific interaction patterns in mind so the app feels natural on both operating systems.
-
Create reusable components: Establish consistent design elements for buttons, cards, forms, navigation bars, pop-ups, and other repeated sections.
-
Test the user flow: Review the prototype to find confusing navigation, unnecessary steps, or screens that require too much user effort.
For React Native projects, a well-planned component structure at the design stage can also make the development phase more consistent and easier to maintain.
3. Choose the React Native Architecture
Before writing production code, developers need to decide how the application will be structured. This step becomes especially important when the app has complex features, multiple user roles, or several integrations.
-
Plan the project structure: Organize screens, components, services, utilities, assets, state management, and other modules so developers can work efficiently as the codebase grows.
-
Select state management: Choose an approach based on the application's needs. Simple applications may rely on built-in React state and Context, while larger products may require solutions such as Redux or another dedicated state management library.
-
Plan API communication: Define how the mobile application will communicate with the backend for authentication, data retrieval, transactions, and other operations.
-
Define navigation: Establish the navigation structure for tabs, stacks, nested screens, authentication flows, and deep links.
-
Plan native integrations: Identify features that require native modules or platform-specific code, such as advanced camera functions, Bluetooth, background processing, or specialized device APIs.
This architectural planning prevents developers from repeatedly restructuring the application when new features are introduced later.
4. Set Up the Development Environment
With the architecture defined, developers prepare the React Native project and supporting development environment.
-
Create the project: Set up the React Native application with the required dependencies, configuration, environment variables, and development tools.
-
Configure iOS and Android: Prepare the project for both platforms and configure the required platform settings, permissions, identifiers, and build environments.
-
Set up source control: Use Git or a similar system to manage code changes, branches, releases, and collaboration between developers.
-
Configure development environments: Keep development, testing, staging, and production configurations separate so changes can be tested safely before release.
-
Set up coding standards: Establish rules for naming, formatting, component structure, error handling, and code reviews to maintain consistency across the project.
A clean setup gives developers a stable foundation before feature development begins.
5. Develop the Core Features
This is where the approved designs and technical architecture are converted into working application features. Developers generally build the core user journey first instead of developing every app feature simultaneously.
-
Build reusable components: Develop common elements such as buttons, input fields, cards, modals, lists, and navigation components so they can be reused across multiple screens.
-
Develop application screens: Implement the main screens according to the approved UI designs while keeping the interface responsive across different device sizes.
-
Connect APIs: Integrate the mobile interface with backend APIs to handle user accounts, content, transactions, search, orders, bookings, or other application data.
-
Implement authentication: Add the required login, registration, password recovery, social login, session handling, and access controls.
-
Add device features: Integrate capabilities such as GPS, camera, push notifications, contacts, files, biometrics, or payments where required.
-
Handle application states: Account for loading, empty, error, offline, success, and retry states instead of showing incomplete or confusing screens.
-
Add validation and error handling: Validate user input and provide useful feedback when an API request fails or a user enters invalid information.
Developers should build the application around reusable React Native components rather than creating separate implementations for every similar screen.
6. Integrate Backend and Third-Party Services
Most modern mobile apps depend on backend systems and external services. These integrations should be tested as part of the actual application flow rather than treated as a separate task at the end.
-
Backend APIs: Connect the app with APIs responsible for storing and retrieving application data.
-
Payment gateways: Integrate the required payment provider and test successful payments, failed transactions, refunds, and transaction status updates.
-
Maps and location: Add mapping, geolocation, route tracking, or location search when the product depends on physical locations.
-
Push notifications: Configure notifications for relevant events such as orders, messages, bookings, reminders, or account activity.
-
Analytics: Add analytics tools to understand feature usage, user journeys, conversion points, and drop-off areas.
-
Third-party authentication: Integrate services such as Google, Apple, or other supported login providers when required.
-
Cloud services: Connect storage, databases, messaging, or other cloud infrastructure based on the application's backend architecture.
Every external service should have clear failure handling so the app can respond properly when the service is unavailable or returns an unexpected response.
7. Test the React Native Application
App testing should happen throughout development rather than being left until the application is considered complete. React Native applications need to be checked across both operating systems because the same feature can behave differently on iOS and Android.
-
Functional testing: Verify that every feature performs the intended action and produces the correct result.
-
UI testing: Check layouts, typography, buttons, forms, images, navigation, and screen behavior across different device sizes.
-
API testing: Confirm that the app correctly handles successful responses, invalid data, authentication failures, timeouts, and server errors.
-
Device testing: Test the application on different iPhone and Android devices, screen sizes, OS versions, and hardware configurations.
-
Performance testing: Check startup time, scrolling, animations, memory usage, network requests, and screen rendering.
-
Security testing: Review authentication, permissions, API communication, sensitive data handling, and local storage.
-
Regression testing: Recheck existing features after major changes to make sure new development has not introduced unexpected issues.
-
User acceptance testing: Give the near-final application to selected users or stakeholders and collect feedback based on real usage.
App testing should cover the complete user journey, not only individual screens.
8. Optimize Performance
Performance optimization becomes important once the application has enough functionality to reveal real bottlenecks. Developers should use actual performance data instead of making unnecessary changes based on assumptions.
-
Optimize large lists: Use appropriate list rendering techniques for screens containing many products, messages, transactions, or other records.
-
Reduce unnecessary rendering: Review component structure and state updates to prevent screens from re-rendering without a reason.
-
Optimize images and assets: Compress large assets and load them efficiently to reduce memory and network usage.
-
Improve API usage: Reduce unnecessary requests, handle caching where appropriate, and avoid repeatedly requesting the same data.
-
Review app startup: Identify large dependencies, unnecessary initialization work, and other factors that slow down the initial launch.
-
Monitor memory usage: Look for memory leaks and components that continue consuming resources after they are no longer needed.
The goal is to make the application responsive under realistic usage conditions rather than only on a developer's device.
9. Prepare for App Store Submission
After testing and optimization, the application is prepared for launch, allowing you to submit your app to the App Store and publish your app on the Play Store after completing the required platform checks.
-
Create production builds: Generate properly configured iOS and Android release builds.
-
Configure signing: Set up the required certificates, signing keys, provisioning profiles, and application identifiers.
-
Prepare store assets: Create the app icon, screenshots, descriptions, promotional content, and other required listing information.
-
Review permissions: Confirm that every requested permission is necessary and properly explained to users.
-
Complete compliance requirements: Review platform policies, privacy requirements, data disclosures, and other applicable submission requirements.
-
Run final checks: Test the production build again before submitting it because production configurations can behave differently from development builds.
10. Launch and Maintain the App
Launching the application is the beginning of the next development cycle rather than the final step. Once the final launch, you need to start the app maintenance services to solve real issues and keep up the app as per current market standards.
-
Monitor crashes and errors: Track application crashes, failed API requests, and other production issues.
-
Review user feedback: Identify recurring complaints, feature requests, and usability problems.
-
Track application performance: Monitor startup performance, screen behavior, API response times, and other important metrics.
-
Release fixes: Prioritize critical bugs and release updates without unnecessarily disturbing existing users.
-
Add new features: Use real usage data and business priorities to decide which improvements should enter future releases.
-
Keep dependencies updated: Regularly review React Native and third-party dependencies to address compatibility issues and maintain the development environment.
As you know, the React native app development process works best as a continuous cycle of planning, designing, developing, testing, releasing, and improving.
This approach helps teams build the first version around real requirements while keeping the codebase ready for future features and platform updates.
React Native App Development Cost: A Pricing Breakdown
A React Native app usually costs from $15,000 to $200,000+. The wide range comes from the size of the project itself.
A simple app with a few screens and one main user flow can start around $15,000 and take only a few weeks to finish.
When the app needs multiple user roles, a full admin panel, real-time features, and different third-party connections, the cost moves toward the higher end and can reach $200,000+.
The framework stays the same, but the number of screens, logic, and polish decides the final price.
Benefits of React Native for Mobile App Development
Leveraging mobile app development with React offers several benefits while keeping the development process more efficient and manageable.
Before investing in this cross-platform framework, let’s explore the key benefits it can bring to your mobile app development process.
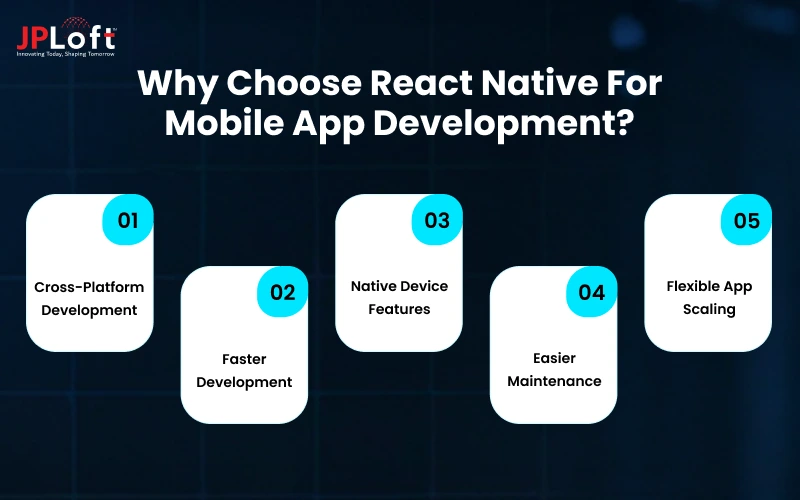
1. Cross-Platform Development
React Native lets developers build applications for both iOS and Android using a shared codebase.
This reduces the need to create every feature separately for each platform.
Teams can reuse components, business logic, and development work while still making platform-specific adjustments where the user experience requires them.
2. Faster Development
Reusable React Native components can help developers build features more quickly.
Changes made to shared code can also be reflected across platforms, reducing repeated development work.
Features such as hot reloading further help developers see code changes quickly, which can make testing and iteration more efficient during development.
3. Native Device Features
React Native can connect applications with important device capabilities such as cameras, GPS, push notifications, Bluetooth, and biometric authentication.
Mobile app developers can also use native modules when a feature requires platform-specific functionality.
This allows businesses to create apps that interact with device hardware instead of being limited to basic interface features.
4. Easier Maintenance
A shared codebase can make ongoing maintenance more manageable after the application goes live.
Developers can identify and fix issues in shared components instead of maintaining completely separate implementations for every platform.
Regular updates, feature improvements, and bug fixes can therefore follow a more organized development process.
5. Flexible App Scaling
React Native applications can grow as your business requirements change.
When you hire mobile app developers, they can add new screens, integrations, user flows, and device features without rebuilding the entire application.
A well-structured component-based architecture also allows developers to reuse existing elements, making future feature additions more efficient.
Limitations of Mobile App Development With React Native
While React native mobile app development offers a practical way to build apps for iOS & Android, it comes with a few limitations.

Understanding these challenges early helps businesses plan their technology and platform-specific requirements more effectively.
-
Platform-Specific Features: Some advanced device features may require native code, increasing development effort for certain applications.
-
Performance Limitations: Complex animations, heavy processing, or graphics-intensive features may need additional optimization compared with fully native apps.
-
Native Dependency: Certain third-party libraries may depend on native modules, requiring developers to understand both React Native and native development.
-
Frequent Updates: React Native updates can sometimes require dependency changes or compatibility fixes across the project.
-
Larger App Size: React Native applications can have a larger initial size because they include the framework and supporting runtime components.
React Native vs Native App Development: Key Differences Explained
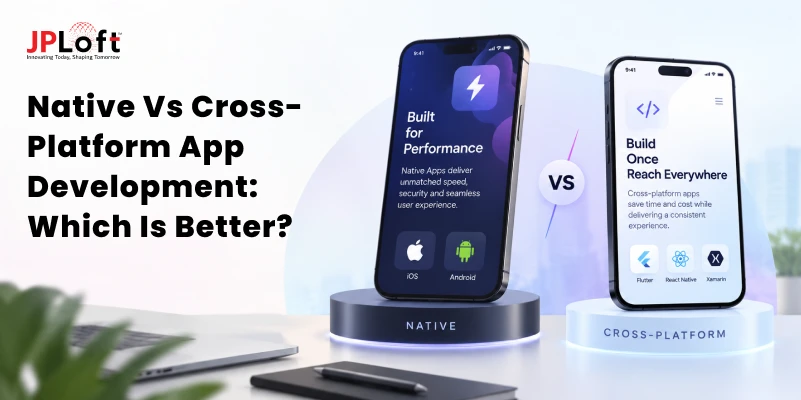
The comparison between React native for app development vs native development depends on your product requirements, target platforms, and technical needs.
React native allows teams to share much of the code across iOS & Android, while native development uses platform-specific technologies.
The differences become clearer when you compare development speed and performance, maintenance, platform support, and access to device-specific capabilities.
|
Factor |
React Native Development |
Native App Development |
|
Platform Support |
One shared codebase can support iOS and Android. |
Separate development is generally required for each platform. |
|
Development Speed |
Reusable components can speed up development across platforms. |
Development can take longer when building separate platform versions. |
|
Performance |
Offers strong performance for most business and consumer applications. |
Provides maximum control over platform-specific performance. |
|
Code Reusability |
A significant portion of the code can be shared between platforms. |
Code is primarily written separately for each platform. |
|
Device Features |
Supports native device features through APIs and native modules. |
Provides direct access to platform-specific APIs and capabilities. |
|
Maintenance |
Shared code can simplify updates and bug fixes across platforms. |
Separate codebases may require platform-specific maintenance. |
|
UI Experience |
Supports native components while allowing shared development patterns. |
Provides complete control over each platform's native interface. |
|
Best For |
Suitable for apps targeting multiple platforms with shared functionality. |
Suitable for apps requiring deep platform-specific optimization or features. |
Best Practices for React Native App Development
Following best practices for react native mobile app development helps keep the code clean, the app fast, and future updates easier.
These practical steps reduce common problems and make the project more stable from the start:

1. Keep the Project Structure Clear
Organize files by features or screens instead of mixing everything together.
A clear folder structure makes it easier for the team to find code and avoid confusion as the app grows.
2. Use Functional Components and Hooks
Prefer functional components with hooks over older class components.
This keeps the code shorter, easier to read, and more consistent with current React patterns.
3. Optimize List Rendering
Large lists can slow down the app if not handled properly.
Use tools like FlatList with proper keys and avoid heavy calculations inside the render method.
4. Minimize Bridge Traffic
Too many messages between JavaScript and native code can reduce performance.
Group related data and limit unnecessary calls across the bridge.
5. Handle Platform Differences Cleanly
Write shared code whenever possible, but isolate platform-specific parts.
This keeps the main logic clean while still supporting small differences between iOS and Android.
6. Test on Real Devices Regularly
Emulators are useful, but real phones show actual performance and behavior. Checking the app on physical devices catches issues that simulators often miss.
Test across different screen sizes, operating system versions, network conditions, and device specifications to ensure the app delivers a consistent experience.
7. Manage State Carefully
Choose a simple state solution for small apps and a more structured one for complex projects.
Keeping state predictable makes debugging and feature changes much easier.
Is React Native Still Relevant in 2026?
React Native continues to stay useful for teams that want to build mobile apps with one shared codebase.
In 2026, many companies still choose it because the framework has matured and keeps receiving regular updates from Meta and the open-source community.
Developers who already know React can move into React for mobile development without learning entirely new languages, which keeps projects moving faster.
The framework now handles performance better than earlier versions, and tools like the new architecture reduce the old bridge limitations.
While fully native options remain strong for highly specialized apps, React Native still works well for most business, eCommerce, and content apps that need to reach both iOS and Android.
For many projects, it remains a practical and reliable choice rather than an outdated one hire.
How JPLoft Helps with React Native Projects?
Building a mobile app that works well on both iOS and Android often feels like managing two different projects at once. Many teams struggle with extra time, higher costs, and inconsistent results across platforms.
JPLoft steps in as a React native app development company that solves this by using one shared codebase for most of the work. Their developers create clean screens, connect the necessary backend services, and test everything on real devices.
Clients receive regular progress updates so they can give feedback early and stay involved. Small platform-specific changes are handled carefully when iOS or Android needs a different touch.
This practical approach helps businesses launch reliable apps without the usual delays and confusion of separate native teams.
Conclusion
React Native remains a practical choice for teams that want to build mobile apps for both iOS and Android without maintaining two completely separate codebases.
It lets developers use familiar JavaScript and React skills while still delivering interfaces that feel native on each device.
The framework works well for many types of apps, from social and shopping products to on-demand services and internal business tools.
Cost, development speed, and maintenance all depend on the size of the project and the features required, but the shared codebase helps keep the process more efficient for most products.
When the right practices are followed and the scope is clearly defined, React Native can deliver reliable results without the extra overhead of fully native development for every platform.
FAQs
Yes, the React Native mobile app framework is suitable for building iOS and Android applications from a shared codebase. It works well for business apps, marketplaces, social platforms, eCommerce apps, and other products that need cross-platform support.
Yes, you can build a mobile app with React that runs on both iOS and Android. React Native allows developers to reuse much of the code while adding platform-specific functionality when the app requires it.
Mobile app development with React uses React Native to create application interfaces with reusable components. Developers can connect these components with APIs, databases, and native device features to build complete applications for different mobile platforms.
React Native can support complex applications with features such as payments, maps, push notifications, authentication, real-time communication, and third-party integrations. Advanced requirements may also use native modules when direct platform-specific functionality is needed.
The cost depends on factors such as app complexity, number of platforms, features, integrations, UI requirements, and development team location. A basic application costs less than a feature-rich product requiring advanced APIs, real-time functionality, or custom native modules.

Priyanka Sukhwal is the Managing Director and Business Head of JPLoft, a results-driven leader with 10+ years of experience steering technology ventures and business growth. Her strategic acumen and deep understanding of digital markets and on-demand solutions have consistently translated into innovations that help businesses scale, evolve, and lead in competitive landscapes.




Share this blog