


Key Takeaways:
An MVP helps startups test an app idea with real users before making a larger investment, allowing them to validate demand, focus on essential features, collect feedback, reduce development risks, and improve the product based on real market needs.
Start by validating the app idea and understanding your target users before development begins.
Prioritize features that solve the main user problem instead of adding unnecessary functions.
Avoid common mistakes such as feature overload, weak research, poor testing, and ignoring user feedback.
An MVP is not always required for funding, but a working product can strengthen your pitch with real user data.
Most MVPs take around three to six months, depending on features, technology, integrations, design, and testing requirements.
Denver's startup scene is booming right now. New founders launch ideas every week, but many fail for one simple reason: they build too much, too soon, before real users even ask for it.
That's where an MVP comes in. It's a simple, working version of your app with just the core features. It shows real users your idea, tests demand, and saves you from wasting money on features nobody wants yet.
Learning how to build an MVP for your app in Denver the smart way means using local resources most founders overlook, from Techstars Boulder mentorship to Denver-based developer talent that already understands lean, fast-moving builds.
This guide walks you through every step. You'll learn how to pick your first must-have feature, choose the right team, and tap into Denver's own accelerators and investors to fund your build.
What Is an MVP App?
An MVP, or Minimum Viable Product, is the simplest working version of your app. It includes only the core features your users truly need, nothing extra.
The goal is to solve one main problem well, without adding features that aren't ready to be tested yet.
Founders use an MVP to test their idea fast. You build only the must-have features, put it in front of real users, and see if they actually want it.
If you're planning to build an MVP app in Denver, this step saves you from months of wasted work on features nobody uses.
MVP vs. Full-Fledged App: What Is the Difference?
An MVP and a full app are not the same thing, and mixing them up can cost you time and money. Here's a simple breakdown:
|
App Type |
MVP App |
Full App |
|
Purpose |
Test the idea |
Serve all users |
|
Features |
Only core features |
Complete feature set |
|
Build time |
Weeks |
Months or years |
|
Cost |
Lower |
Higher |
|
Goal |
Learn from feedback |
Scale and grow |
Why Should Denver Startups Build an MVP First?
Denver's startup scene moves fast, and founders who skip validation often waste money on features nobody asked for.
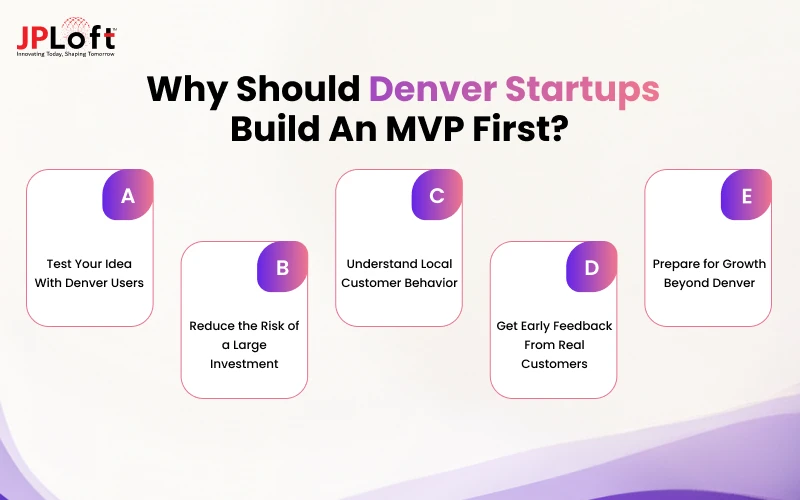
Here's why starting with an MVP makes sense for any Denver-based idea:
1. Test Your Idea With Denver Users
Denver has a tight-knit founder community, making it easy to reach real early users. Testing locally gives you honest, fast feedback before you spend on a full build.
You'll learn quickly if your idea solves a real problem. This is one of the fastest ways to validate MVP app development in Denver without guessing what users actually want.
2. Reduce the Risk of a Large Investment
A full app can cost tens of thousands of dollars. Building an MVP first means you spend less upfront and avoid the risk of investing heavily in features users may never use.
If the idea doesn't work, you've lost weeks, not months. This lean approach fits Denver's practical, proof-first investor mindset perfectly.
3. Understand Local Customer Behavior
Denver users have their own habits, needs, and expectations shaped by the local market. An MVP helps you observe how they actually interact with your app.
This insight is hard to get from guesswork alone. Real usage data shows you what to build next, and what to leave out entirely.
4. Get Early Feedback From Real Customers
Early feedback shapes a better product. Denver's founder meetups and demo days make it simple to make an MVP app in Denver and put it in front of real users and investors early on.
Their input helps you fix problems before they become expensive. It's a faster, cheaper way to learn what your product truly needs.
5. Prepare for Growth Beyond Denver
Once your MVP proves demand locally, you're better prepared to scale. Investors want to see traction before backing bigger growth plans beyond one city.
A strong local MVP becomes your proof point. It's the foundation for expanding your app into new markets with confidence.
What Features Should a Denver Startup Include in an MVP?
Picking the right app features is the hardest part of any MVP app development guide in Denver.
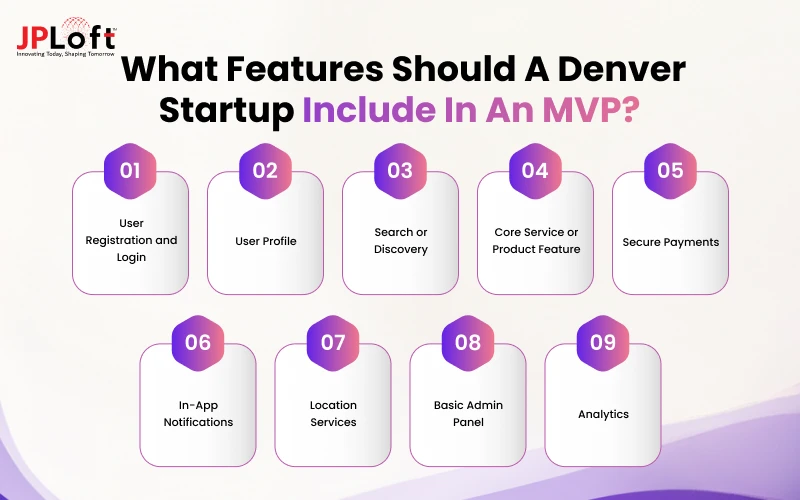
Focus only on what your users truly need to use and understand your app well.
► Registration and Login
Give users a simple, secure way to create an account and log back in easily. Keep the process short, so new users don't drop off before they even try your app.
► User Profile
Add a basic profile page showing user details, preferences, or activity history. This helps users feel like the app remembers them and builds a small sense of ownership from day one.
► Search or Discovery
Let users quickly find what they're looking for within your app. A simple search bar or filter saves time and keeps users from getting frustrated while exploring your product.
► Core Service or Product Feature
This is the one main function your app is built around, the true reason users open it. Every other feature should support this single core action, not distract from it.
► Secure Payments
If your app involves transactions, add a safe, trusted way to accept payments. Founders who develop an MVP app in Denver with secure checkout build early trust with cautious first-time users.
► In-App Notifications
Simple alerts keep users informed and engaged with your app. Use them sparingly at first, just enough to remind users to return without overwhelming their notification screen.
► Location Services
This is useful for apps tied to Denver neighborhoods, deliveries, or local discovery. Local founders building MVP app development in Denver often rely on this to personalize the user experience.
► Basic Admin Panel
A simple backend lets your team manage users, content, and data without needing a developer for every small change. This saves time as your app grows.
► Analytics
Basic tracking shows how users interact with your app from day one. This data helps you decide what to build next and what features aren't worth keeping.
Startups that follow this feature list when they create an MVP app in Denver avoid overbuilding and stay focused on what actually gets tested with real users.
How to Build an MVP App in Denver: Step-by-Step
Now that you understand why an MVP matters, it's time for the real work.
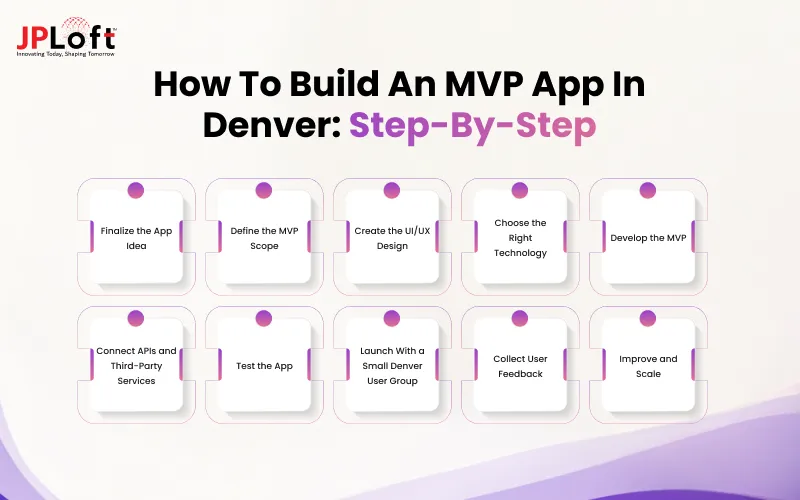
This step-by-step process breaks down how to build an MVP app in Denver, from your first idea to a working, testable product ready for real users.
Step 1: Finalize the App Idea
To build a mobile app, start by writing down the exact problem your app solves for Denver users, and be specific about who faces this issue daily. This clarity keeps your team aligned from day one and prevents costly direction changes later.
-
Define your target user clearly
-
Write a one-line problem statement
-
Check if the idea solves a real, everyday need
-
Research similar apps already used across Denver's startup community
Step 2: Define the MVP Scope
Decide which features are truly essential right now and which can wait until later versions of your app. This step keeps your build focused, affordable, realistic, and manageable for a small founding team.
-
List every possible feature you can imagine
-
Mark each one as must-have or later
-
Keep only what solves the core problem
-
Avoid adding extra features that quickly delay your launch date now
Step 3: Create the UI/UX Design
Design simple, clean screens that are easy for any user to understand right away. Reliable UI/UX design services at this early stage save time later and keep users from feeling confused, frustrated, or lost.
-
Sketch basic app wireframes before building anything
-
Focus on ease of use over decoration
-
Keep navigation simple and predictable throughout
-
Test the design flow with a few sample users first
Step 4: Choose the Right Technology
Pick tools and frameworks that match your budget, timeline, and long-term app goals. Founders following a solid MVP app development guide in Denver should weigh build speed against future flexibility before committing fully.
-
Compare no-code, low-code, and custom development options
-
Match the stack to your team's existing skills
-
Choose tools that can scale as your app grows
-
Avoid locking yourself into one vendor too early
Step 5: Develop the MVP
This is where your startup app idea in Denver actually becomes real, working software. Developers turn your design and feature list into a functional product, focused only on the core actions users need most.
-
Build core features first, nothing extra
-
Avoid adding new ideas mid-development
-
Keep communication tight between design and development teams
-
Review progress often to stay on schedule
Step 6: Connect APIs and Third-Party Services
Link outside tools like payment gateways, maps, or notification services your app needs to function smoothly. This step often shapes how reliable and professional your MVP feels to first-time users.
-
Choose trusted, well-documented APIs only
-
Test each integration separately before combining them
-
Keep third-party connections simple for your MVP stage
-
Document each integration clearly for your development team
Step 7: Test the App
Before anyone else sees your app, test everything yourself first. Look closely for bugs, broken flows, or anything confusing that could frustrate early Denver users before your public launch day.
-
Perform app testing on multiple devices and screen sizes
-
Check every core user action carefully
-
Fix major bugs before moving forward
-
Ask a teammate to test with fresh eyes
Step 8: Launch With a Small Denver User Group
Release your MVP to a small, local group of users first. This lets you learn from real Denver users in a friendly, low-risk setting before opening things up to the public.
-
Start with twenty to fifty local users
-
Use Denver founder meetups or local networks
-
Watch how users actually behave, not just what they say
-
Keep the group small enough to manage closely
Step 9: Collect User Feedback
Ask direct questions and pay close attention to real usage patterns as people use your app daily. Feedback at this stage tells you exactly what to fix, add, or remove next.
-
Send short surveys right after each use
-
Track where users drop off inside the app
-
Talk to users directly whenever possible
-
Group feedback into themes before making changes
Step 10: Improve and Scale
Use what you learned from real users to refine your app, then plan your careful next move forward. Knowing how to create an MVP app in Denver properly means treating this whole process as an ongoing cycle.
-
Prioritize fixes based on real feedback
-
Add features only when data clearly supports them
-
Plan your next funding or growth step
-
Revisit your product roadmap every few months
How Much Does It Cost to Build an MVP App in Denver?
Building an MVP app in Denver typically costs from $5, 000 to $100,000+, depending on your app's complexity and team choice.
This range covers everything from a simple, single-feature app to a more advanced MVP with multiple integrations. The exact cost to develop an app in Denver depends on several key factors that shape your final budget.
Understanding these early helps you plan realistically and avoid surprise expenses once development is already underway with your team.
So, let’s discuss such factors in detail:
1. Number of Platforms
Building for iOS, Android, and the web separately raises costs. Starting with one platform keeps your MVP budget lower.
2. Feature Complexity
More advanced features, like real-time chat or AI, take longer to build and increase overall development costs.
3. UI/UX Requirements
Custom, detailed designs cost more than simple templates. Clean, minimal design keeps your early MVP budget manageable and fast.
4. Backend Development
A more complex backend, handling heavy data or logic, increases both development time and total project cost.
5. Hiring Cost
The cost to hire app developers in Denver can impact the overall price of developing a mobile application.
6. Security Requirements
Apps handling sensitive data need stronger app security measures, which add both development time and testing costs upfront.
Common Mistakes Denver Startups Should Avoid When Building an MVP
Even well-planned MVPs can fail if founders fall into common traps.
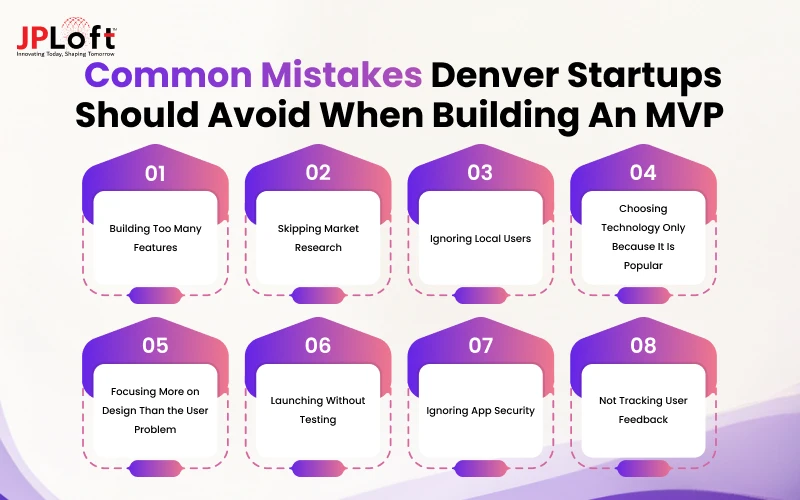
Here are the mistakes Denver startups should watch for closely.
Mistake 1: Building Too Many Features
Adding extra features early slows your launch and increases costs. Stick to only what your core users truly need first.
Mistake 2: Skipping Market Research
Launching without proper market research leads to wasted effort. Research your competitors and audience before writing a single line of code.
Mistake 3: Ignoring Local Users
Denver users have their own habits and expectations. Founders who make an MVP app in Denver without local input often miss what actually matters to users.
Mistake 4: Choosing Technology Only Because It Is Popular
Trendy tools aren't always the right fit. Choose technology based on your needs, such as AI in mobile app in Denver, not what's currently popular elsewhere.
Mistake 5: Focusing More on Design Than the User Problem
Beautiful design means little if your app doesn't solve a real problem. Prioritize function first, polish second.
Mistake 6: Launching Without Testing
Skipping proper testing leads to bugs reaching real users. Always test thoroughly before your public launch date, no exceptions.
Mistake 7: Ignoring App Security
Weak security puts user data at risk early on. Founders who build an MVP app in Denver the right way treat security as a core requirement, not an afterthought.
Mistake 8: Not Tracking User Feedback
Ignoring feedback means missing chances to improve. Set up simple ways to collect and review user input from day one.
What Should You Do After Launching Your MVP?
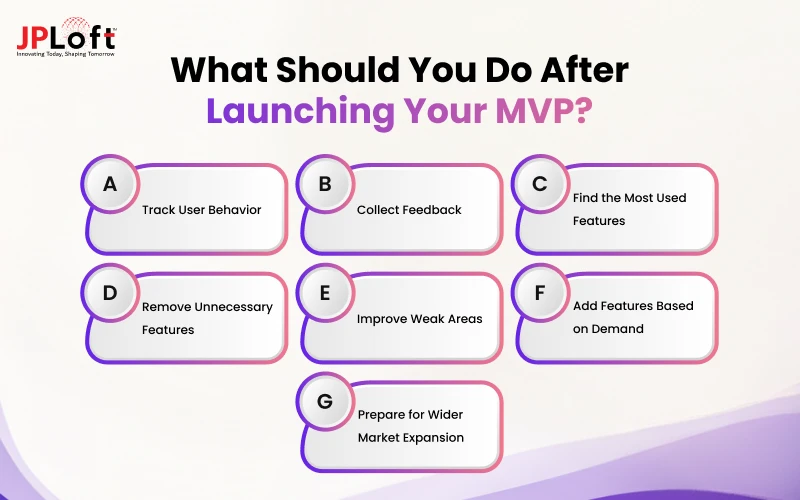
Launching your MVP is just the beginning, not the end what you do next shapes whether your app truly succeeds or quietly fades.
1. Track User Behavior
Watch how people actually use your app daily. Their real actions tell you more than opinions.
-
Use simple analytics tools
-
Note where users drop off
-
Check daily active users
2. Collect Feedback
Ask users directly what they like or dislike. This is key knowledge that founders learning how to create an MVP app in Denver need early.
-
Send quick surveys
-
Read app store reviews
-
Talk to users personally
3. Find the Most Used Features
Look at which features get used the most often. This shows you exactly what users value.
-
Check feature usage data
-
Rank features by activity
-
Focus future work here
4. Remove Unnecessary Features
Cut features nobody uses to keep your app simple. Less clutter means a better user experience.
-
Review low-usage features
-
Ask why they're ignored
-
Remove or simplify them
5. Improve Weak Areas
Fix parts of your app that confuse or frustrate users. Small improvements build long-term trust.
-
Identify common complaints
-
Prioritize quick fixes
-
Test changes with users
6. Add Features Based on Demand
Only add new features once users clearly ask for them. This keeps your app focused and useful.
-
Track feature requests
-
Validate demand first
-
Build gradually, not all at once
7. Prepare for Wider Market Expansion
Once your MVP proves itself locally, plan your next move. Founders who develop an MVP app in Denver successfully often expand beyond the city.
-
Study new target markets
-
Plan funding for growth
-
Scale based on proven demand
How Can JPLoft Help Build an MVP App in Denver?
Building an MVP takes more than just code; it takes the right team behind it. JPLoft is a trusted mobile app development company in Denver, helping startups turn simple ideas into working, testable apps fast.
Our team works closely with founders to define scope, design clean user experiences, and build only what truly matters at the MVP stage. We understand Denver's fast-moving startup culture and build MVPs that are lean, functional, and ready for real investors and users.
From idea validation to full development, testing, and post-launch support, JPLoft handles every step so you can focus on growing your startup. Whether you're pre-funded or already backed, our team helps you move quickly without cutting corners on quality.
Conclusion
A successful app always starts small, and that's exactly the point. Learning how to build an MVP app in Denver gives founders a clear, low-risk path to test ideas before investing heavily in a full product.
From defining your scope to launching with real Denver users, every step in this guide helps you build smarter, not just faster. Denver's growing startup scene, strong local talent, and proof-focused investors make it an ideal place to build an MVP app in Denver the right way.
Whether you're validating your first idea or preparing for your next funding round, a well-planned MVP sets the foundation for lasting growth. Focus on real user feedback, keep your build lean, and let each step guide your next decision with confidence.
FAQs
Start by validating the idea, defining users, selecting core features, designing the product, developing it, testing the MVP, launching it, and collecting user feedback.
An MVP is the first working version of a product with essential features. It helps startups test their idea, collect user feedback, and improve the product.
Start with the features that solve the main user problem. Rank each feature by user value, business need, development effort, and its importance for testing assumptions.
Common mistakes include adding too many features, skipping user research, ignoring feedback, choosing unsuitable technology, underestimating testing, and treating the MVP as the final product.
An MVP is not always required for funding. However, a working product can demonstrate market demand, user interest, product potential, and progress to potential investors.
MVP development costs range from $8,000 to $100,000+, depending on feature complexity, platform requirements, integrations, design needs, testing, and the development team's size.

Priyanka Sukhwal is the Managing Director and Business Head of JPLoft, with 10+ years of experience in technology, digital product strategy, and business growth. She has worked closely with businesses building mobile applications, custom software, marketplaces, and on-demand platforms across mobility, automotive, consumer services, and startup ecosystems. At JPLoft, she focuses on understanding business models, identifying product opportunities, and helping companies plan digital solutions that can scale with changing market needs.



Share this blog